


What you get and what makes us different to our competitors
Core & advanced features which ensure you get the most out of our signing software.
Our platform seamlessly integrates with most industry specific providers.
We have a flexible pricing model to suit anyone’s specific needs.
Digital signing which integrates with most Recruitment ATS & CRM’s
Improve staff & client experience with digital signatures & notary.
Increasing compliance across life science & device businesses.
Solutions for state, federal, local, county & regional government.
Founded in 2010 to be a simple, smart, and secure signing platform.
Your hub for security, compliance, and transparency.
Technology which ensures non-forgeability & non-repudiation.
What you get and what makes us different to our competitors.
Our platform seamlessly integrates with most industry specific providers.
We have a flexible pricing model to suit anyone's specific needs.
Frequently asked questions and solutions that might be relevant to you.
Watch Demo Video here
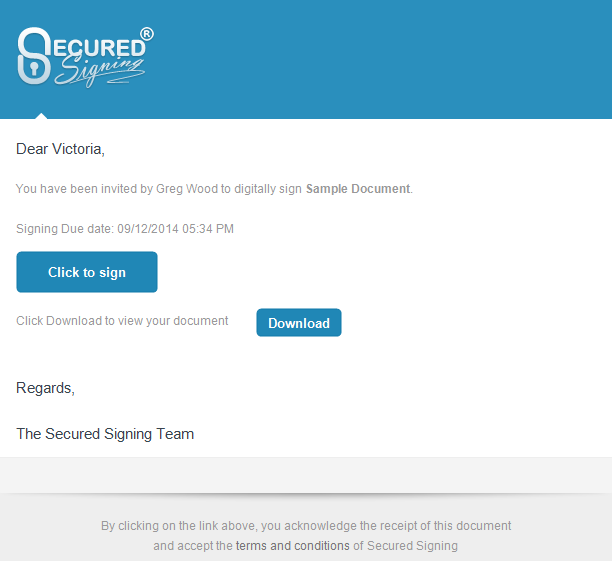
You will receive and email invitation from the document owner to sign a document or documents.
Click on the blue button to start the signing process.
Depending on the authentication method that was chosen by the document owner you may need to enter a passcode, enter the code sent to your mobile number or complete an ID verification process.
Once you are successful in the authentication process you will be able to review the document.
Review the document and signatures’ placement by scrolling around the document.
As part of the signing completion you will be prompted for the details of who will be the Witness. An email invitation will be sent to the Witness requesting them to view the document and sign.
If the document owner requested it, you could be prompted to enter additional details before the document is signed such as:
To start signing, click the blue Signature Box: Click to Sign
Tip: If there are multiple Signature Boxes on the document, we recommend clicking the blue arrow as this will guide you to the next Signature Box accordingly.
If you have not captured your Signature, the My Signatures pop-up window will open where you can capture, create, upload or Fax us your Full Signature and your Initials.
Once you have captured your graphical signature it is stored in the Secured Signing service ready to use whenever you get invited to Sign.
Check out Capture your graphical signature for a more detailed example.
Signing Completed!
The document has been signed. The signed document will be returned to the document owner and you will receive a signed file at your email inbox.